
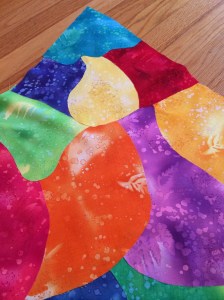
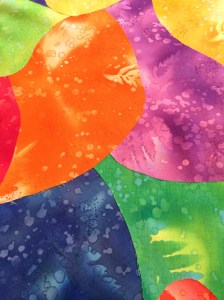
When I saw the painting that inspired The Kite Perspective, two things struck me and have remained vivid memories in all the years I’ve carried this design in my head. The bright colors and the abstract shape of each color as part of the whole.
My initial sketch was very geometric.

However, I knew that wasn’t what I wanted the quilt to be as soon as I finished drawing it. But I colored it anyway so I’d have a visual concept from which to work. I wondered how I could piece the fabric together if I cut it with curves. Until I went to IQF Chicago in June. Where the puzzle of how to build my puzzle was solved.
At the show, I peered intently at the numerous, miraculous works of fabric art and a light bulb went off: MistyFuse and top stitching along the raw edge! As soon as I had the idea, I also did a mental face palm because, really? Crazy simple solution and I’d complicated it in my head.
But this light bulb moment is one of the reasons why I think it is important to attend quilt shows and guild meetings and talk to other quilters. The answer will almost always be found by looking at another piece of art or talking about it with another artist.
~
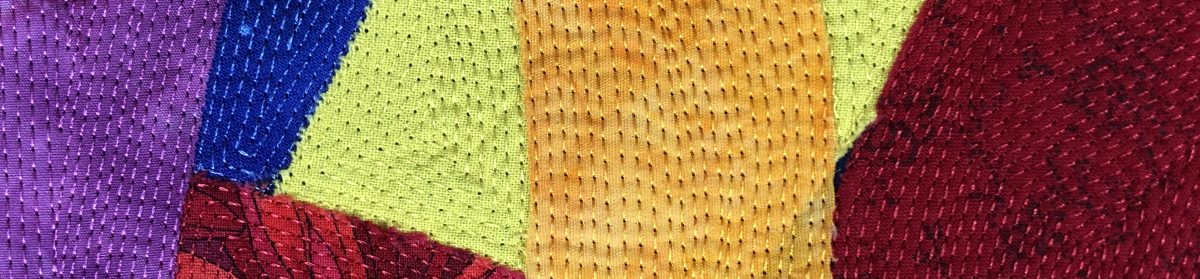
In Part 1, I shared photos of the paper pattern I made to cut out the design pieces. I used triangles for the back, so that was pieced with a 1/4″ seam allowance. For the top, I cut the fabric to match the pattern piece, allowing for overlap. I then laid all the pieces on the full size poster board mock-up. Working one at a time, and by piece number, I pinned the pieces together at the overlap, flipped to the wrong size and drew a guideline on what would be the “top” piece. I cut MistyFuse to fit and ironed. Once all the pieces were fused to create the kite top, I top stitched just shy of the raw edge using a corresponding thread color.
Next week: Part 3 – The Quilting
How did you solve your last art puzzle?


One thought on “The Kite Perspective, Part 2”