This is a slow going piece of art (I believe it will end up artful – I was filled with that skepticism that often arises at the mid-point of a project until the leaves were added).
The tree has been planted. Leaves have bloomed and drifted to ground in the rain storm.
The tree is hand-dyed wool; the leaves are hand-dyed silk. Both pieces of fabric were purchased.
I’m loving this with the leaves.
This completes the top.
Next up: I’ll select a backing fabric (in grey), make a quilt sandwich, and start quilting, followed by binding, printing the poem on fabric, and hand stitching the poetry label to the back.
If you come back next week, I’ll share whatever progress has been made.
I spent the best part of the week creating the “canvas” for Words for Grey, so this is going to be a short post because there’s not a lot of status, or work, to report.
(By “best part”, I mean the random time available after day job, exercise, chores, errands, meals, etc. You know, life. Long weekend does not necessarily equal more free time.)
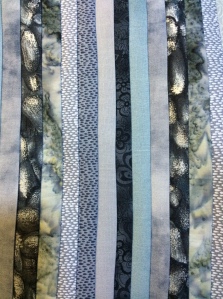
Anyway, the “canvas” is five strips each of 10 different greys, 1″ wide, and sewn together on the 1/4″. Once completed, it had a warp to it that gives off the illusion of 3-D.
I love bright colors so I wasn’t sure I’d love a grey canvas, but it seems to shimmer and who doesn’t like a good shimmer?The shimmer shows a little better here
I like it.
I’m sure there’s some neat trick one can use when strip piecing so the finished product lays flat but I’m not sure I want to know said trick. I like the life this has as it buckles. Rain doesn’t fall straight and true. Why should this?
I still need to square off the top and bottom, but I want to finish the layout first.
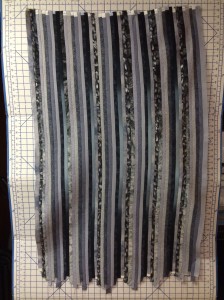
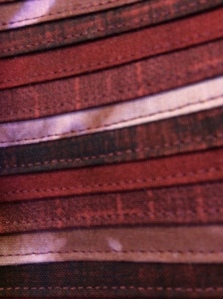
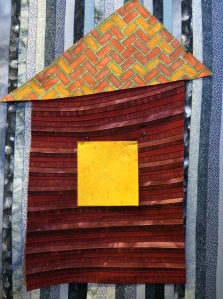
The cabin is made of five strips each of four brick-reds, cut 1″ wide, folded in half, wrong sides together, then stitched with a slight overlap to create “siding”.
The cabin strips warped to an even greater degree than the grey, which demanded the roof go on at a jaunty angle, turning the piece into a fun little redwood log cabin.
See the siding? See the warp? It’s like the cabin is planning to climb the wall.I love the whimsy.
Once I plant a tree and it sprouts a few leaves, this quilt top will be complete. Please come back next week and I’ll show you.
Do you want to know the tricks or do you prefer when work has quirks?
In previous posts (here and here), I mentioned the poem that provided the inspiration to combine my poetry with my quilts. Around this same time, I was also reading Wonderbook: The Illustrated Guide to Creating Imaginative Fiction by Jeff Vandermeer. My taste in books is nothing if not eclectic.
Wonderbook is aimed at science fiction and fantasy writers, which I am not, but I carry a strong conviction that lessons can be learned about story structure and character development in any genre. And besides, the book was filled with imaginative art work as visual aid for story telling, which was a selling point.
I don’t think we ever out grow the desire to read picture books.
I was reading this very intriguing book because I intend to finish my novel someday. Nothing more. I expected to learn more about the art of writing. Maybe pick up a couple of pointers to guide me in the process. I did not expect to learn something about making art.
I think that’s what did it, really. The book, combined with my poem and the picture the poem drew in my mind, exposed the connection between my compulsion to tell stories (even in the typical short narrative form of poetry) and my desire to create something that is visually pleasing (quilts).
The What If? moment came while reading the book.
The AHA! moment came with the poem.
So this is the journey to bring Words for Grey, the poem, to life, as the quilt.
Next week: Part 2 – Creating the Canvas
Do you find inspiration in what seem like random connections?
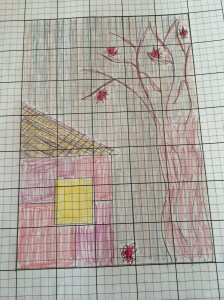
Rough, original sketch of “Words for Grey” after writing the poemDetailed sketchMost, but not all, of the fabric. Still need roofing “material”
I’m amazed at how pleased I am that I finally made this quilt. I’ve carried the design in my head for close to a decade and to see it come to life was so satisfying.
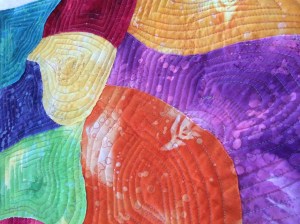
I considered several options on how I wanted to quilt it. Straight lines radiating out from the center, like a star burst? Follow the diamond shape of the kite, starting in the center and grow the diamond as I neared the edge? Or follow the abstract shape of each piece?
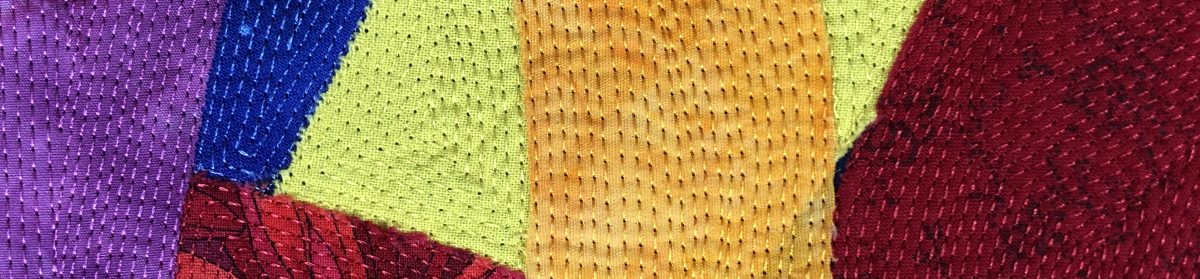
I went with option 3, the abstract shape because that was the finished product I could see in my head. I used a cotton / poly Madeira rainbow variegated thread in both the needle and the bobbin. I would have loved to use metallic thread, but I gave up trying to fill a bobbin after one epic, snared fail.
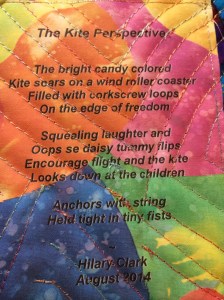
Stitching short strips of each of the fabrics used in the quilt top created the binding. I used to have mad skills to machine stitch the binding to catch on the back, but those seem to have diminished with all the years of not quilting, so I hand blind stitched to anchor the binding to the quilt. I added little “V” pockets at each corner on the back to hold dowels for hanging. And, of course, added a tail because what is a kite without a tail?
I had such fun making this fun design. I could see mass producing the pattern one day in the near future for others to make their own.
To follow the construction stages for this quilt, please see Part 1 and Part 2.
How do you feel when you complete something you’ve waited a long time to do?